You-Attend · Attendance
Attendance Grid
The register. Mark who is present, decide what attendance is worth, and send it to your gradebook.
What it is
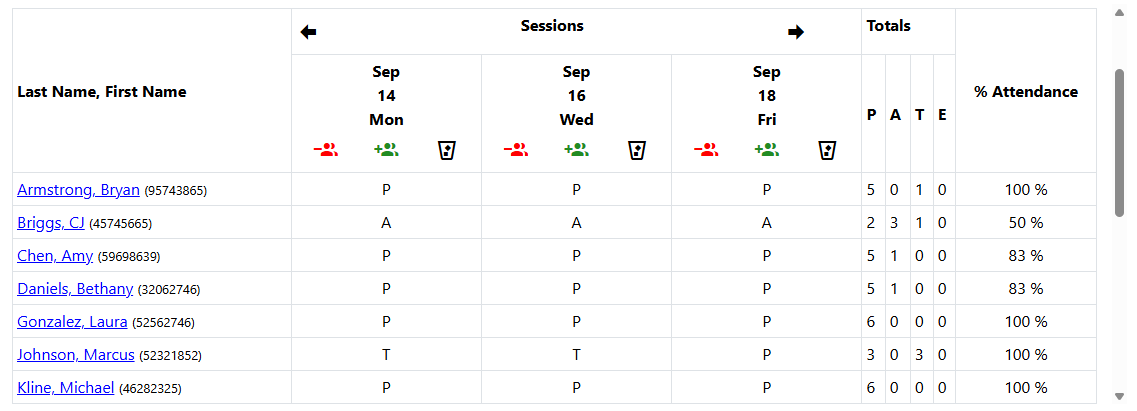
The Attendance Grid is the register: students down one side, dates across the top, a mark in each cell. Everything else in You-Attend — the Toolbox activities, the Pass/Fail Roster, the reports — writes into it or reads out of it.
It is also where a course is configured. The dates the course runs, the days it meets, what a present is worth, whether any of it reaches the gradebook: all of that lives in the grid’s Course Settings, and the rest of You-Attend follows it.
Adding it to a course
There are two ways into the grid, and the difference between them matters more than it looks.
On Brightspace, You-Attend usually appears as a widget on the course homepage. Opening it there takes the register perfectly well.
But a widget cannot carry a gradebook column. Brightspace will not attach a grade item to a homepage widget, so a course reached only that way records attendance and sends no grades — quietly, because the attendance itself is fine.
So add the grid to the course as a content item as well:
- In your course, add content from the You-Attend Toolbox, the same way you add any other external item.
- Choose Grid. This creates the gradebook column.
- Open it once. Go to Course Settings and save them — see Setting the course up.
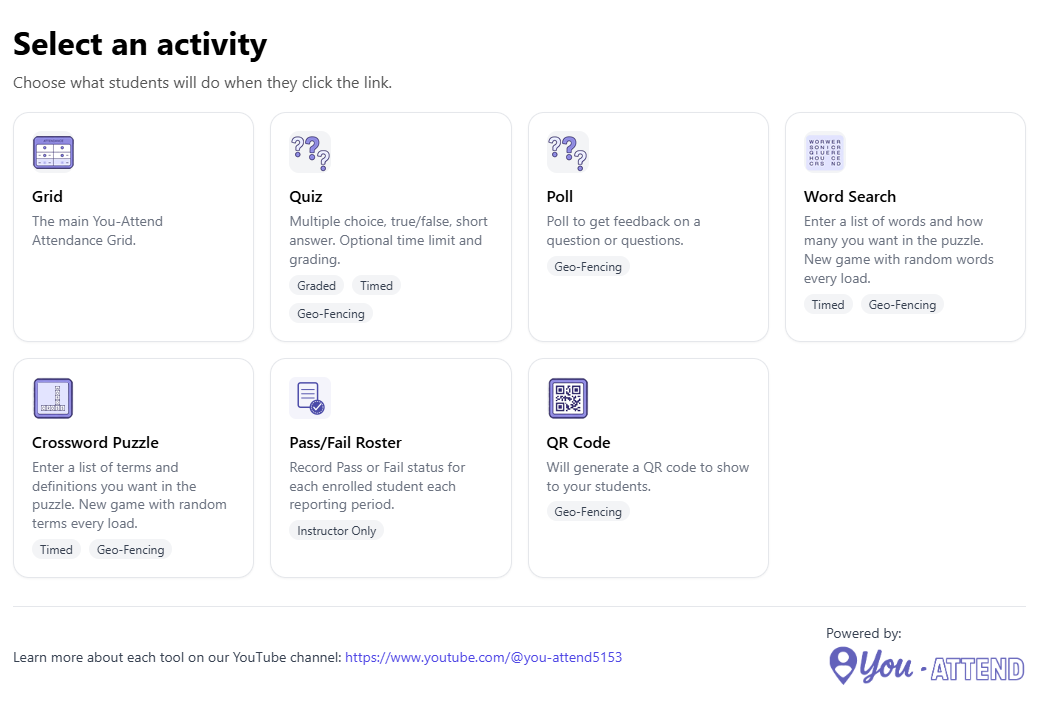
Do this once per course. Attendance then reaches the gradebook from then on, including attendance taken from the homepage widget. On Canvas and Moodle, where the grid is added as a content or assignment item to begin with, this is already the case.
Saving Course Settings also does something else: until they are saved, the You-Attend Toolbox offers only the Attendance Grid. Quiz, Poll, Crossword, Word Search, QR Check-In and Pass/Fail Roster stay hidden until the course is set up.
Setting the course up
Open the grid and go to Course Settings.
General Settings
| Setting | What it does |
|---|---|
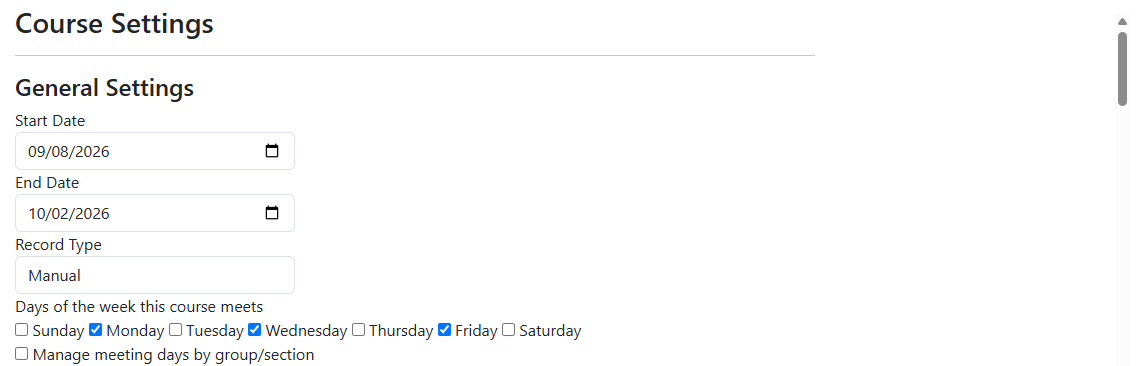
| Start Date, End Date | The span of the course. Attendance outside it is not counted, and dates outside it are not offered. |
| Record Type | How attendance is taken for this course. |
| Days of the week this course meets | Tick the days you actually teach. This is load-bearing: a day you have not ticked is not a meeting day, and check-ins on it are refused rather than recorded. It also sets how many sessions the course has, which is what an auto-adjusting gradebook denominator counts. |
| Number of Entries Per Week | How many sessions a week the course expects. |
| Excluded Dates | Reading weeks, holidays, a canceled class. An excluded date is not a meeting day and counts toward nothing. |
| Include IP address of user when recording entries | Off unless your institution has enabled it. Records the network address a self-service check-in came from, so off-campus check-ins can be spotted. |
The meeting days are the setting to get right first. Most of what people later report as a bug — a student refused at check-in, a grade denominator that looks wrong, a date that cannot be marked — is a day that was never ticked.
Attendance codes
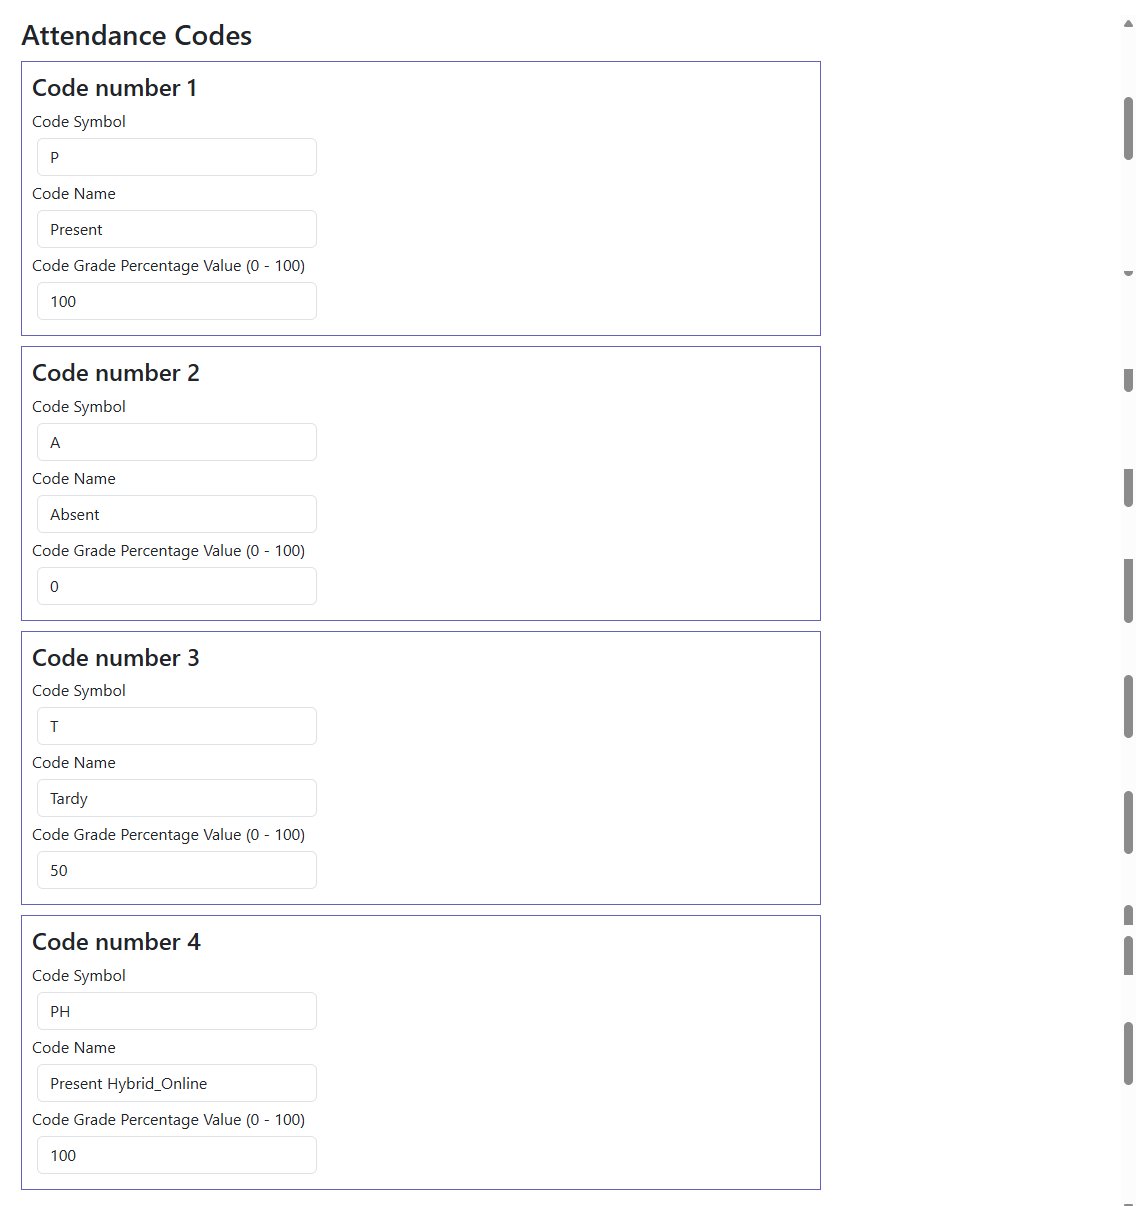
Codes are the marks you can put in a cell: present, absent, tardy, excused, and anything else your institution uses. Each one has a symbol, a name, and a Code Grade Percentage Value (0 - 100).
That percentage is what the code is worth. Present is normally 100, absent 0, and a tardy somewhere between — 50 means a late arrival earns half the credit of the session. The grade You-Attend sends is built from these, so changing a code’s percentage changes what every mark of that code is worth.
The gradebook
Under Gradebook Integration:
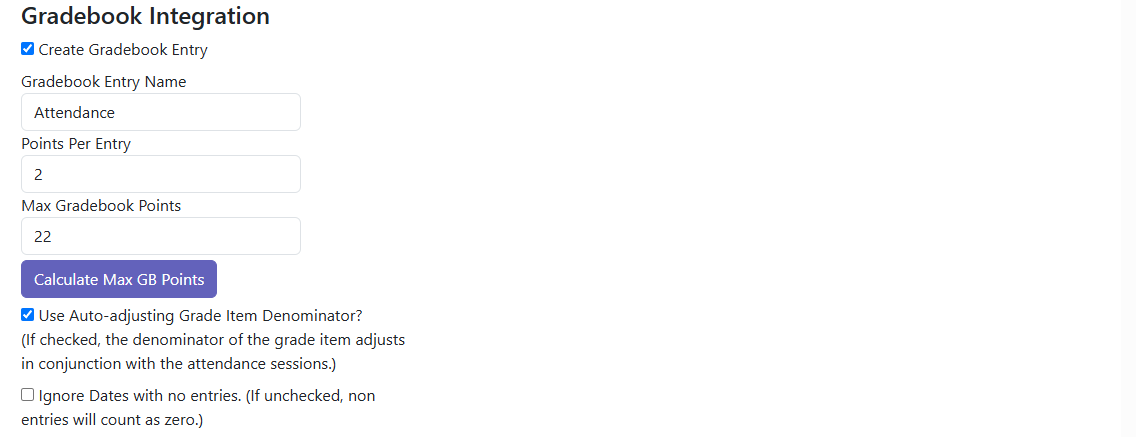
| Setting | What it does |
|---|---|
| Create Gradebook Entry | Whether attendance reaches your gradebook at all. Leave it off and the grid is a register and nothing more, which is a legitimate way to use it. |
| Gradebook Entry Name | What the column is called in your gradebook. |
| Points Per Entry | What one session is worth. |
| Max Gradebook Points | What attendance is worth in total. Calculate Max GB Points works it out from your meeting days and points per entry rather than making you do the arithmetic. |
| Use Auto-adjusting Grade Item Denominator | When on, the denominator grows as the course progresses, so a student is marked out of the sessions held so far rather than out of the whole term. Without it, everyone looks like they are failing attendance in week two. |
Grades are sent as you mark attendance. If a grade cannot be sent, You-Attend tells you so and says whether it will try again — some failures are temporary and are retried on their own; others, such as a course with no gradebook column, need the fix described in Adding it to a course and say so plainly.
Taking the register
Open the grid, pick the date, and mark each student. There is a mark-all for the common case where nearly everyone is present, and you change the few who differ.
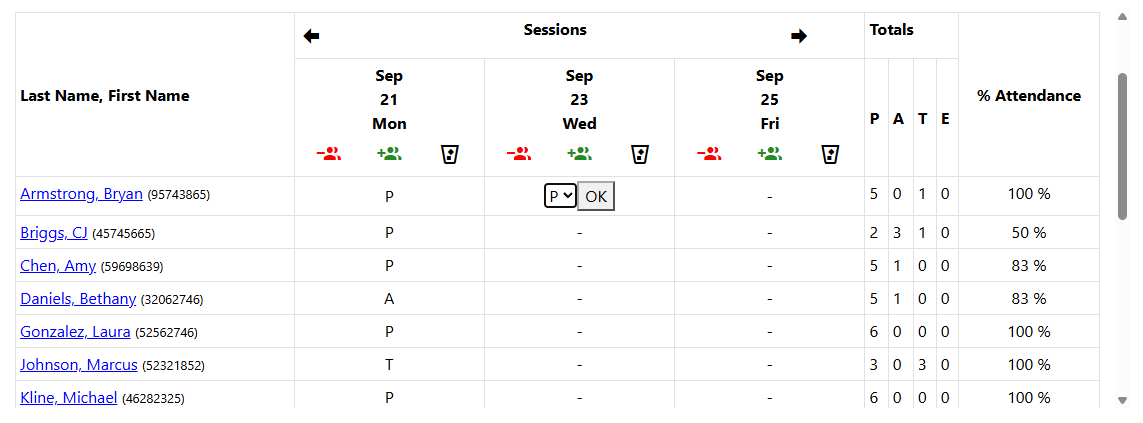
Attendance recorded by a Toolbox activity — a QR check-in, a quiz, a poll — appears in the grid as soon as the student submits. You do not need to do anything to bring it across; the activities are another way of filling in the same register.
A course whose Record Type is the in-class PIN works differently: You-Attend generates a number for the day, you read it out, and students enter it themselves.

Where the class list comes from
You-Attend reads your class list from your LMS. It never asks you to type one in, and it is never edited inside You-Attend — a student who should not be there is a student to remove from the course.
Institutions connected to their LMS’s API get the full enrollment list immediately. On a trial, and anywhere that connection is not configured, You-Attend uses the standard LTI membership service instead, which reports the students who have opened the course. A new course therefore fills in as students arrive rather than appearing complete on day one. It is not a lost roster and nothing needs fixing; it catches up on its own, and a full class list is part of moving from a trial to a subscription.
If something is wrong
| What you see | What it usually is |
|---|---|
| Attendance saves but no grades appear in the gradebook | The course has no gradebook column, which is what happens when the grid is only ever reached from the Brightspace homepage widget. Add the Attendance Grid from the Toolbox — see Adding it to a course — and attendance already recorded is sent once the column exists. |
| Only some of your students are listed | The class list is coming from the LTI membership service, which lists students who have opened the course. It fills in as they do. See Where the class list comes from. |
| The class roster could not be loaded from your LMS | Different from the above, and it says so: nothing came back at all. Reopen You-Attend from the course, and contact support if it persists. The grid is not an empty class. |
| A student cannot check in, or a date cannot be marked | That day is not a meeting day — either not ticked under Days of the week this course meets, or listed under Excluded Dates. |
| Everyone’s attendance grade looks far too low | Use Auto-adjusting Grade Item Denominator is off, so students are being marked out of the whole term rather than the sessions held so far. |
| The Toolbox only offers the Attendance Grid | Course Settings have not been saved for this course yet. Open the grid, open Course Settings, and save. |