You-Attend · Attendance Toolbox
QR Check-In
Show a code in class and let students record their own attendance by scanning it with a phone.
How the timeout works
A QR Check-In item holds one code, and each student can use that code once. They scan it, their attendance is recorded, and the code is finished for them. If you show it again next week, everyone who attended is told Attendance already recorded and this week’s attendance is not counted.
That is what QR Code Timeout is for. Set one, and the code works a class at a time instead:
- Opening the QR Code tab starts a window lasting the number of minutes you set.
- Each student can check in once during that window.
- When the window closes, scans are turned away until you open another.
- Next class, open the QR Code tab again. A new window starts, and the same code works again.
A timeout is what lets one code serve a course all term. Leave it blank only for a one-off check-in — a guest lecture, a single event — where nobody needs to scan twice.
Opening the tab is what starts the clock, not saving the setting. If you open the tab an hour before class to check the code, that window will have closed by the time students arrive; open it again and a fresh one starts. Re-opening the tab while a window is already running does not extend it.
Setting it up
QR Check-In is added to a course from the You-Attend Toolbox in your LMS, the same way you add any other content item. You configure it from its Settings tab, under QR and Attendance Settings.
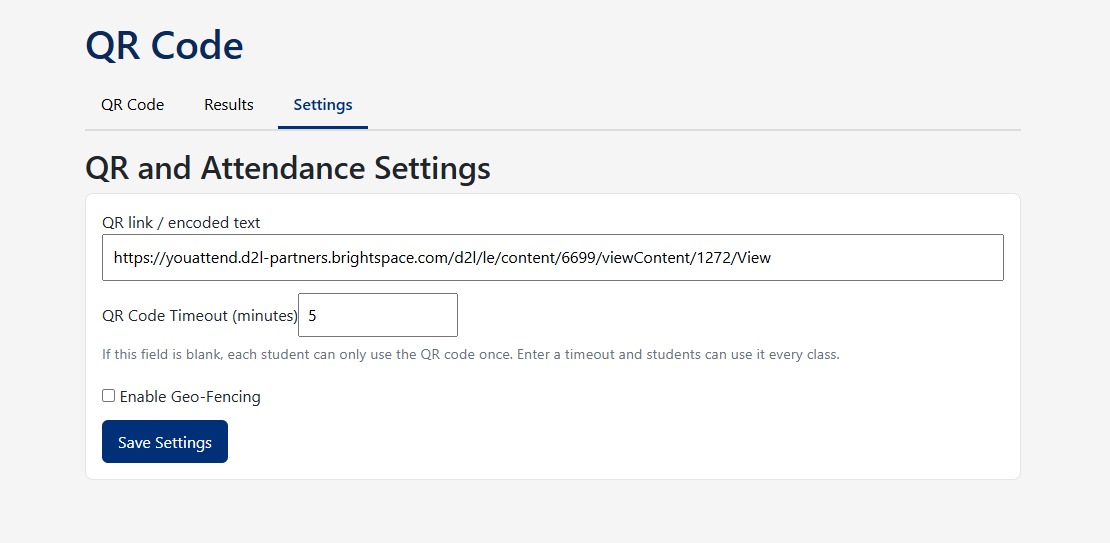
- Enter a QR Code Timeout in minutes — 1 to 240 — if the class meets more than once.
- Tick Enable Geo-Fencing only if students have to be near the classroom to check in, then set the center and radius — Geo-Fencing covers that in full.
- Save. The QR Code tab now shows the code.
QR link / encoded text is filled in for you, and you should not need to touch it.
Running a class
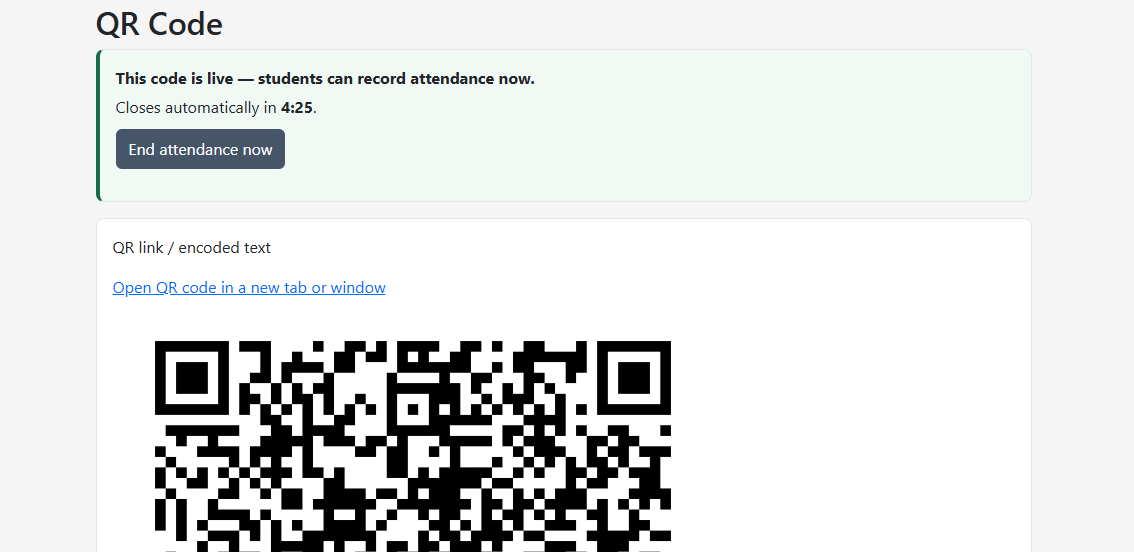
- Open the QR Code tab and put it on the projector. If you set a timeout, the page confirms the code is live and counts down to the close.
- Students scan the code with their phone camera and follow it into your LMS, where they sign in and are shown a Record Attendance button.
- Watch the Results tab fill up. It lists who has checked in, newest first.
- Press End attendance now if the class finishes early, or leave the window to expire on its own.
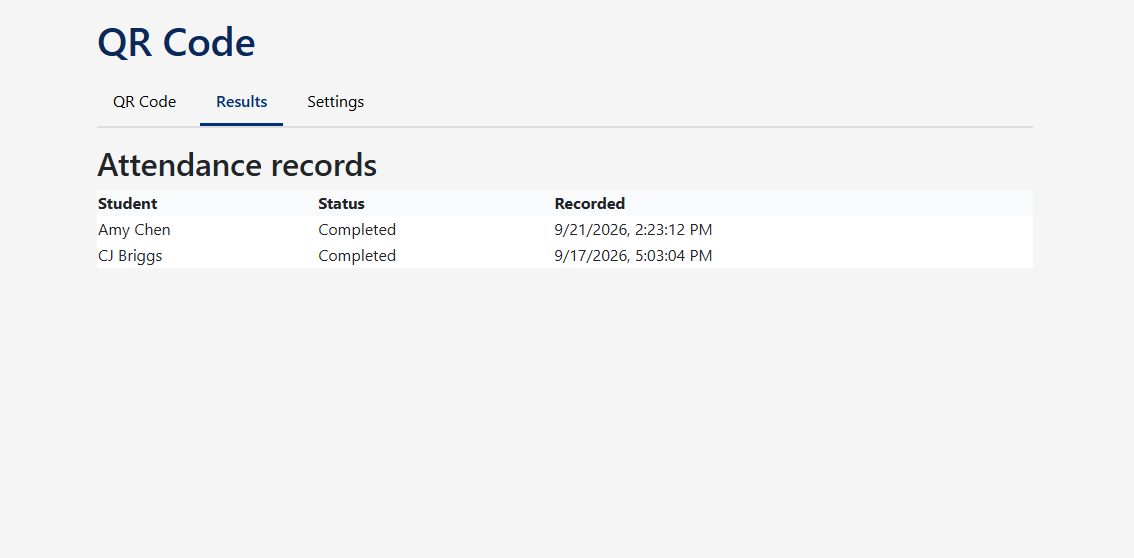
Attendance appears on the normal attendance grid straight away, and posts to your gradebook on the same rules as any other entry.
Every setting
| Setting | What it does |
|---|---|
| QR link / encoded text | The address the QR code points at, inside your own LMS. You-Attend builds it from the course the activity was launched from, the first time an instructor opens it, and saves it. You can overwrite it if the code needs to point somewhere specific, and a value you set by hand is never replaced. |
| QR Code Timeout (minutes) | How long the code accepts check-ins for, starting when you open the QR Code tab. 1 to 240 minutes. Blank means each student can use the code once, ever. |
| Enable Geo-Fencing | Off by default. When it is on, a student has to share their location and be inside the area you set, or the check-in is refused. Ticking it reveals the Campus location, Latitude, Longitude and Radius (meters) fields. See Geo-Fencing, which covers the area, the radius and how to approve a student who is refused. |
What students see
A student scans the code, arrives in your LMS, signs in if they are not already, and taps Record Attendance. They get a confirmation with the time.
With geo-fencing on, they are asked to share their location first. A student who is outside the area, or whose phone will not produce a location at all, can ask you to let them in — see Geo-Fencing.
Scanning again after checking in shows the confirmation again. Nothing is counted twice.
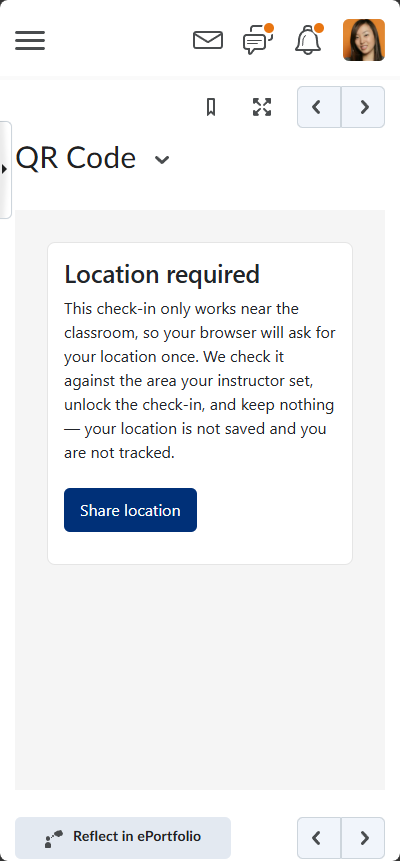
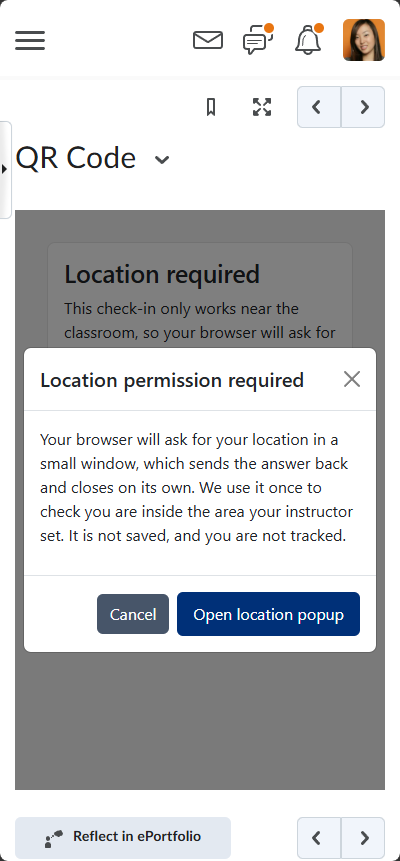
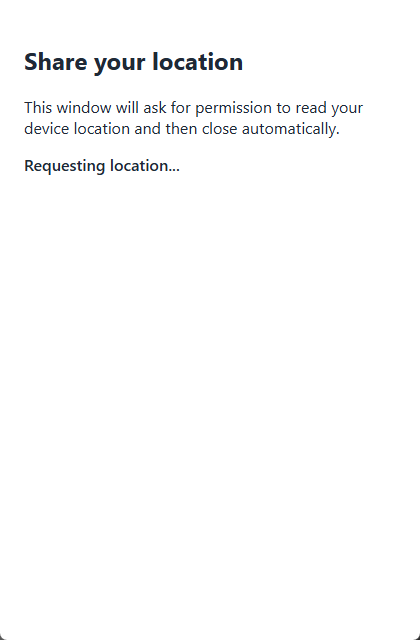
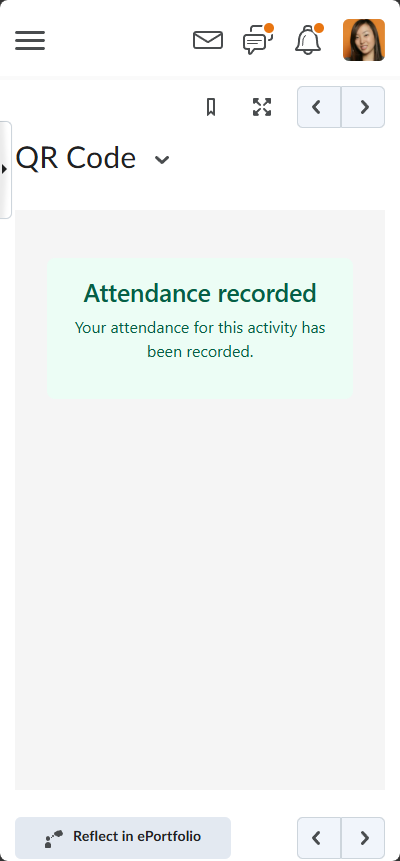
Without geo-fencing on, a student sees only the last of those — they tap Record Attendance and get the confirmation.
Canvas courses must not be public
A Canvas course set to Public is served to people who are not signed in, and Canvas then launches You-Attend without telling us who the student is. Those check-ins are refused, because there is nobody to record attendance for. Keep courses on the default Course visibility.
If something is wrong
| What you see | What it usually is |
|---|---|
| Scanning says the item is not available, or not authorized | On Brightspace this is almost always the course’s own start and end dates, or the content item’s availability dates, keeping students out. Check those in your LMS first: the scan never reaches You-Attend. |
| Attendance already recorded | No timeout is set, and those students have used this code before. Enter a QR Code Timeout and open the QR Code tab again. |
| This QR code is not active right now | The window has closed. Open the QR Code tab to start a new one. |
| Some students can check in and others cannot | Usually geo-fencing. Approve the ones who ask for an override, then widen the radius before the next class. See Geo-Fencing. |
| Nothing appears under Results | Check that a window is open and that the code on screen is the current one. If a student says the scan worked, ask what the confirmation said. |